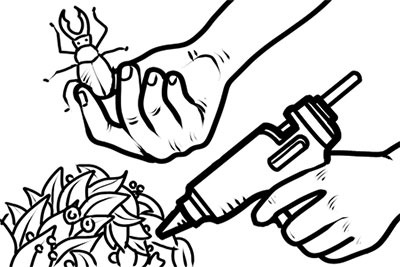
Most people think of a wreath as that ring of pine you put on your door in December and then take down in January — or maybe February, if you’re a procrastinator. Jacqueline Krejnik-Ryan of Asrai Garden, who has worked in floral design for 14 years, sees this as a missed opportunity. A wreath “can become a permanent art piece,” she says. “It’s a way to explore a different side of florals.” Using materials that dry well allows you to continuously fill in and edit your wreath throughout the year. You’ll be able to watch it “transform, the way nature around you would.” Here’s how to get started.
Supplies needed
- 12-inch metal wreath hoop
- 24-gauge green floral wire
- One bunch each of two to five types of big, leafy greenery (waxier leaves like scrub ivy, bay leaves, or eucalyptus will hold up better)
- A couple of bunches of filler plants: assorted grasses, waxflower, goldenrod, and thistles
- As many blooms as desired (strawflower, spray roses, and mini hydrangeas will dry well over time)
- One bag of gray Spanish moss
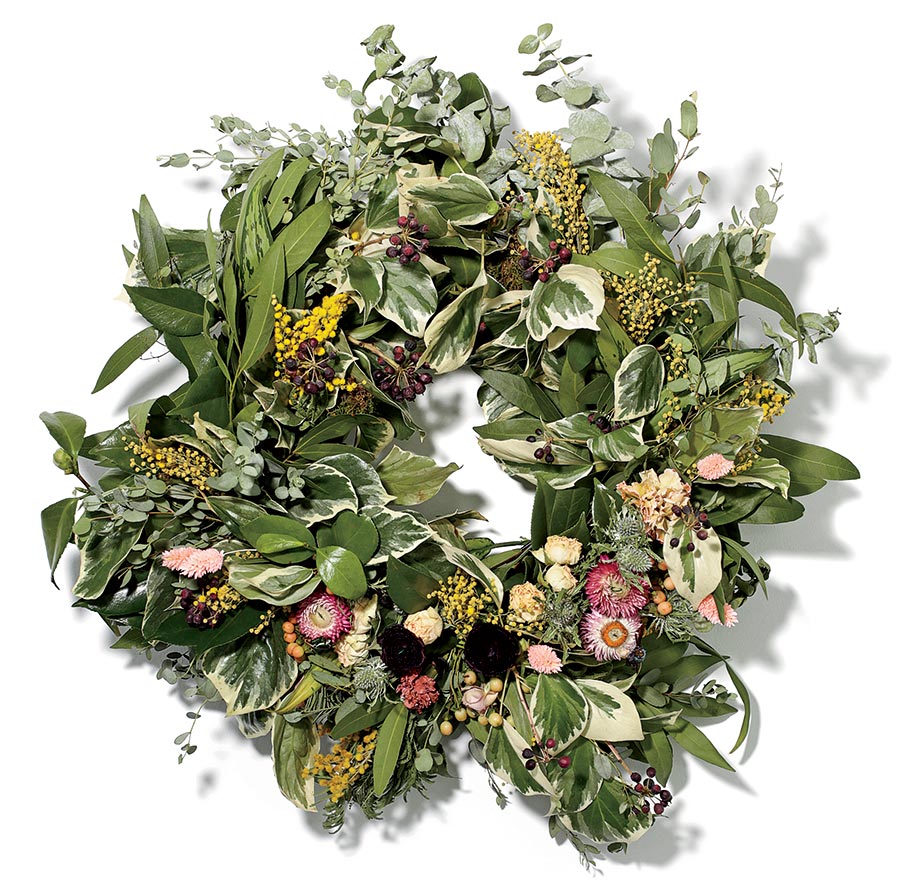
1. Bundle the leafy greenery into clusters of two to five stems with wire. Wire them to the hoop, layering them and tucking stems underneath, until you have a full base.

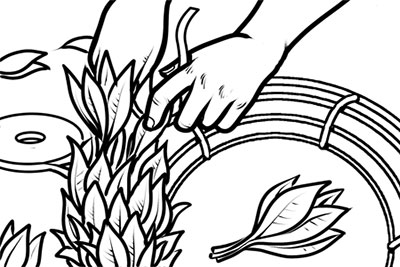
2. Weave filler plants into the wired bundles, tucking in exposed stems.
3. Weave in the blooms, securing with wire as needed. Create a focal point or spread evenly for a symmetrical look. Use moss to fill in holes.
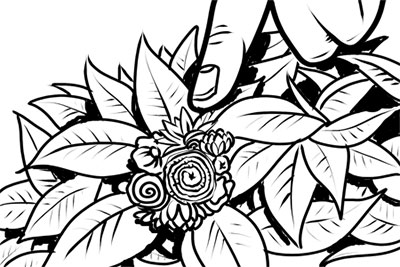
4. Add embellishments with a hot glue gun. “This is where you can get really creative — beads, crystals, berries, or plumes from your yard,” says Krejnik-Ryan. “We have even added taxidermized bugs.”